Making a Simple Menu in VR
Tutorial followed:
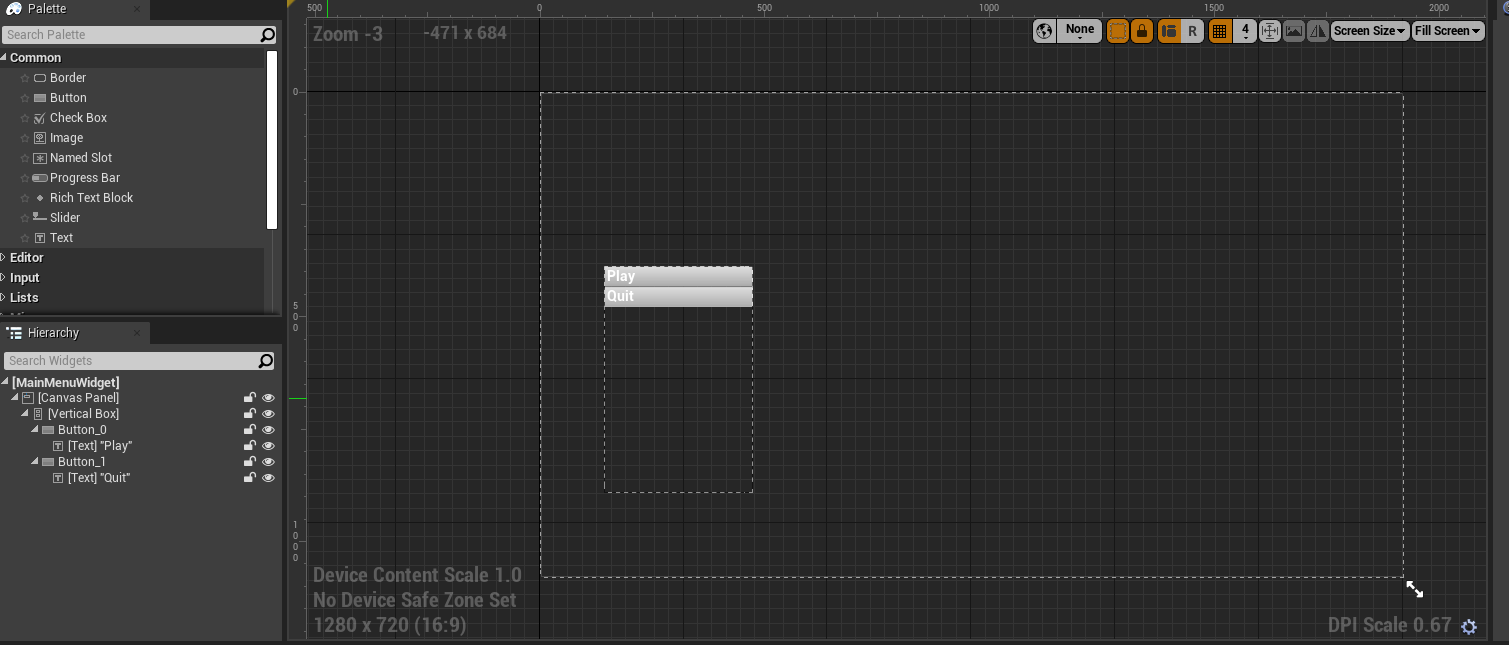
In order to make a simple menu, we must first create a new level under file. I went for the default template, and save the level in my content browser. I went into the project settings and found maps & modes, and set the new level as the default one.In the content browser I made another folder named UI. Inside the folder, I right clicked to add a new widget blueprint. This UI allows us to use the menu to transport between levels or quit. Double click the new widget and firstly, make sure you have a canvas panel. Search the palette for a vertical box and add it to the widgets. Also add 2 buttons and 2 textboxes. I arranged mine on the canvas to and changed the text to 'play' and 'quit'.
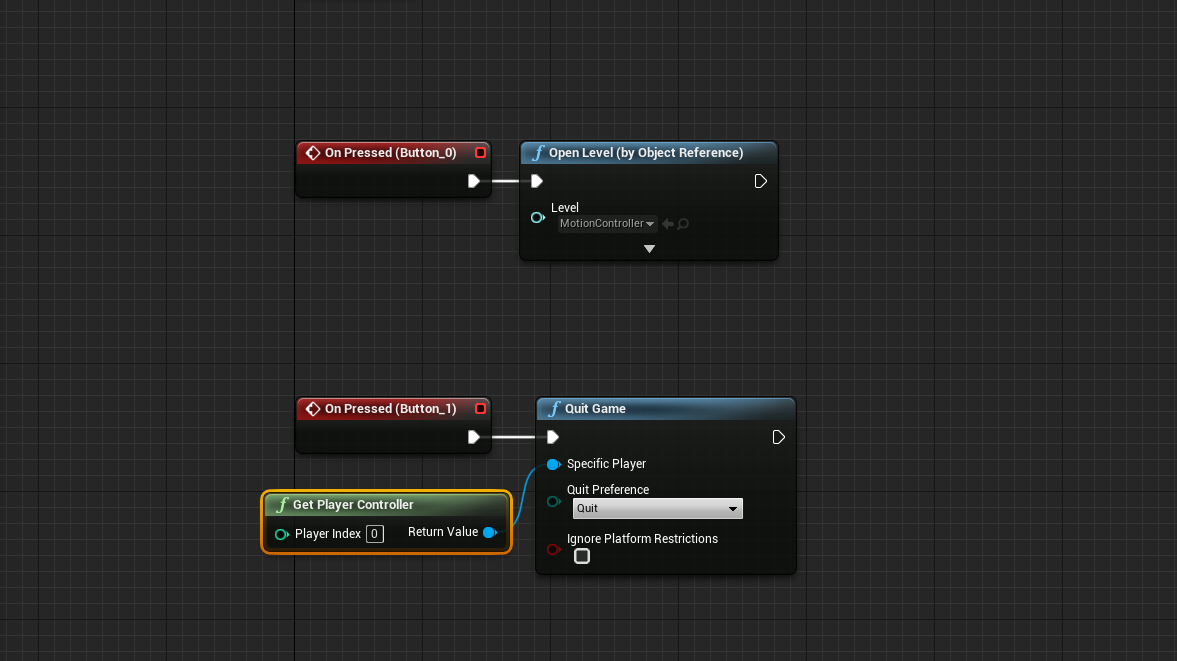
Click on one of the buttons and scroll down on the right hand side. Click 'on pressed' to bring up the event graph. Go back to the designer section, and repeat for the second button. On the event graph, there should now be 2 on pressed buttons.
For the start button, search for open level by object reference.
For the quit button, take the quit game node. From the specific player pin, get the get player controller node.
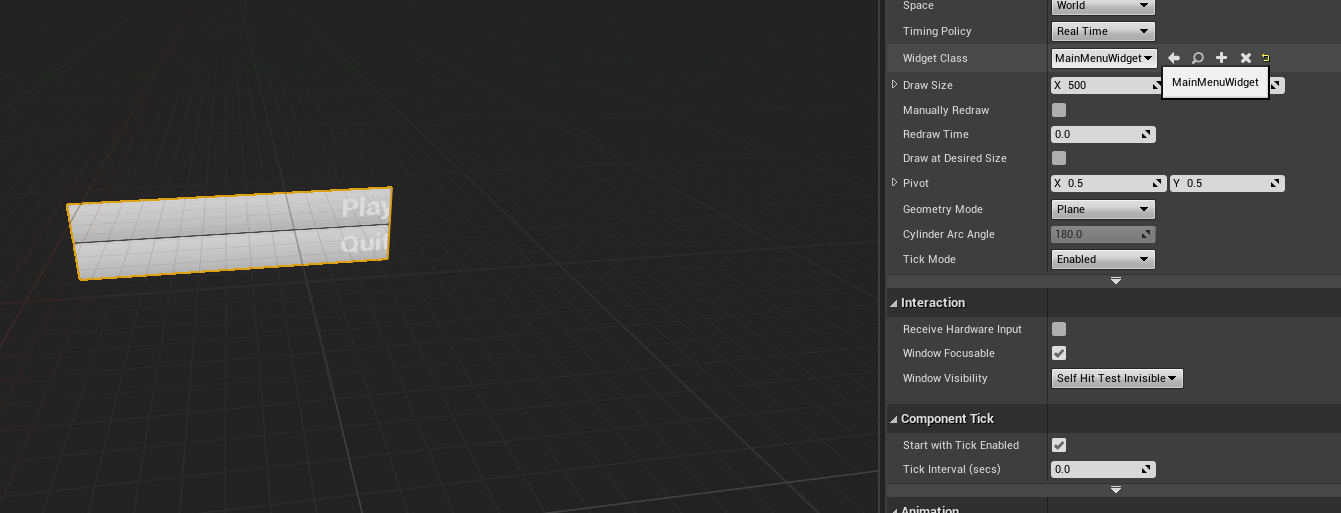
Go back to the content browser and create a blueprint class actor. I named mine Widgetmenuactor. Create a Widget component and make this the default scene root. Under user interface, and widget class, make it the mainmenuwidget. Save and the menu should now be visible on the viewport. Mine wasn't at first, but I changed the canvas size to 500x500 on the widget designer and then it was visible.
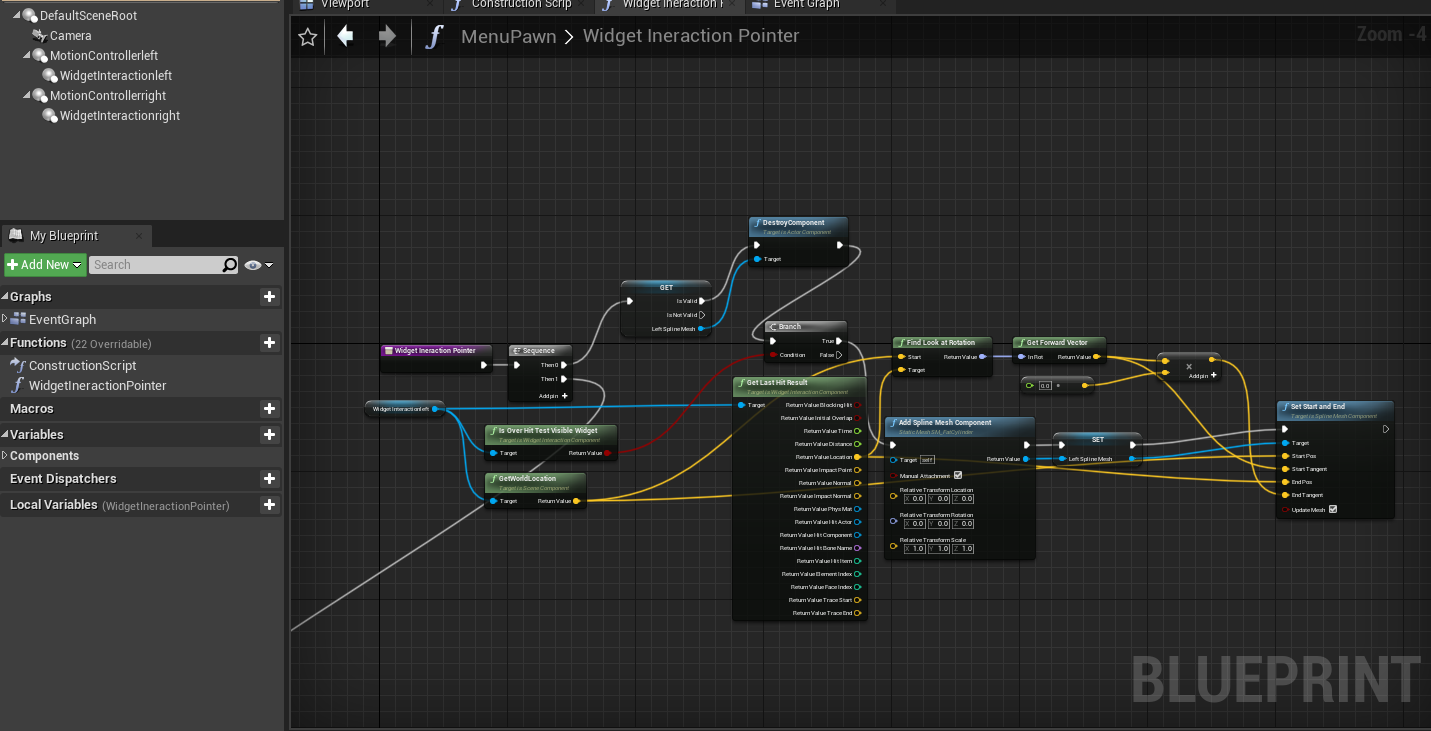
Now to make the main menu pawn. This is done by adding a blueprint class and pawn. Go into the viewport for it and add a camera, and 2 motioncontrollers. One should be the left, and the other the right. It is defaulted as motion controller left, so only adjust the right motion controller's settings by changing the motion source on the details.
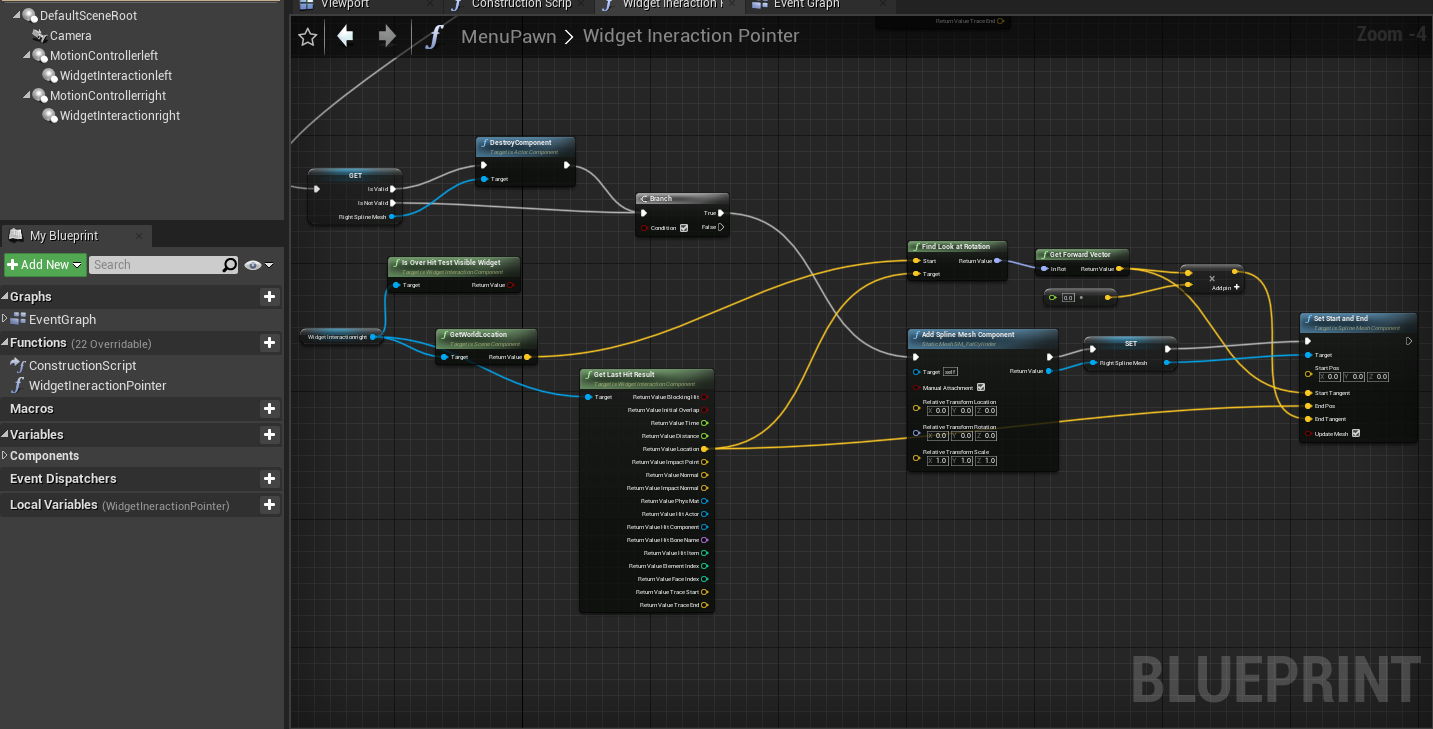
The next part of the tutorial was to add the widget interaction pointer within the menu pawn. This will be joined onto sequence which must connect to get left spline mesh, as I started with the left pointer first. From this, make a node called DestroyComponent and connect to branch. The pin 'condition' should connect to the Is Over Hit Test Visible Widget node, which is conjoined with the component Widget Interactionleft. This component will be affixed to Get Last Hit Result. From the aforementioned node's pin, 'return value location', connect these to Find Look at Rotation. This is also joined with GetWorldLocation and Get Forward Vector. Multiply from the return value and include the element float.
Another important node needed is the Add Spline Mesh Component one. Make sure to tick Manual Attachment. Promote the return value to a variable and call it Left Spline mesh. At the very end of the nodes, put a Set Start and End node.
Copy and paste the nodes from 'get' onwards. Connect only the sequence to the newly pasted nodes. 'Widget interactionleft' must be changed to right, or vice versa. Change the promoted variable to Right Spline mesh too. Update mesh at the very end, and that concludes the widget interactionpointer.
The slightly easier part is on the Event Graph. Begin with the left trigger node- adjoin to Widget Interaction Pointer and widget interactionleft. Don't forget the release pointer key- change both keys to Left Mouse Button. Copy and paste everything but change the widget interaction to right.
Now, we should have a pawn that can interact with the menu.
Visual Reality
Explore the map and try out the different interactions.
| Status | Prototype |
| Category | Assets |
| Author | lish123 |
| Tags | customise, First-Person, functions, interactions, Singleplayer |
More posts
- Design ElementsJan 20, 2023
- ChallengesJan 20, 2023
- Drawing on SurfacesJan 16, 2023
- Climable Interaction Part 2Jan 16, 2023
- Interactive buttonJan 16, 2023
- Climbable Interaction Part 1Jan 15, 2023
- Making an Interactable Door in VROct 14, 2022
- Getting StartedOct 14, 2022
Leave a comment
Log in with itch.io to leave a comment.