Interactive button
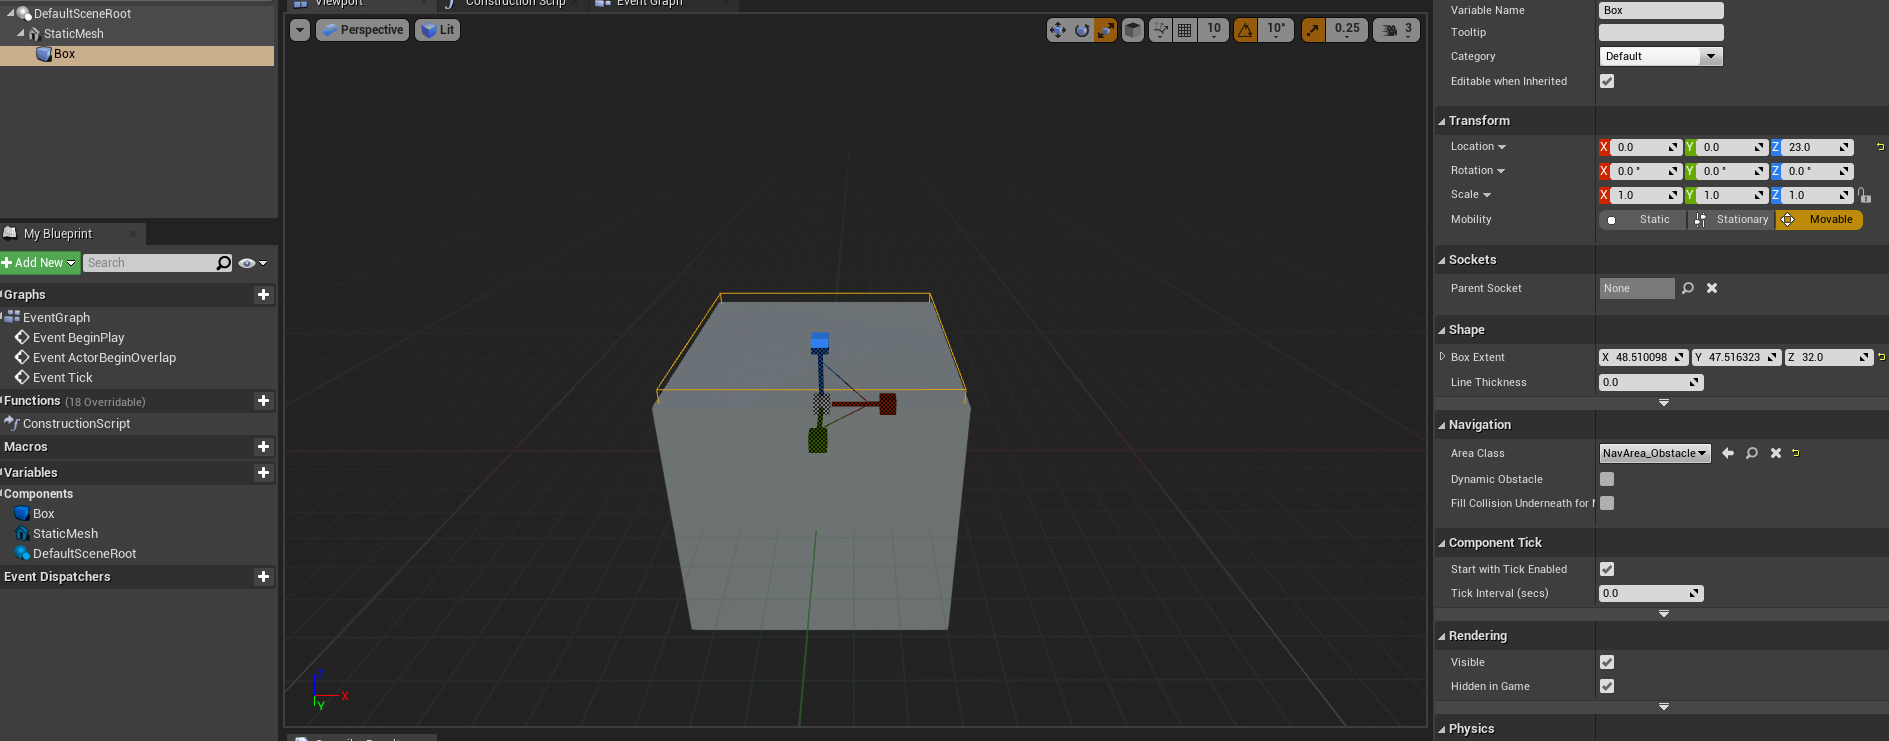
To begin making the button, we must make a blueprint class actor and go into the viewport for it. Add a component for a static mesh and add whatever object you like for the static mesh. I used a 1M_cube. Ensure you add box collision and adjust the size to barely stick out the top and join the box with the staticmesh. I also added an arrow and transformed the rotation of Y by 90.
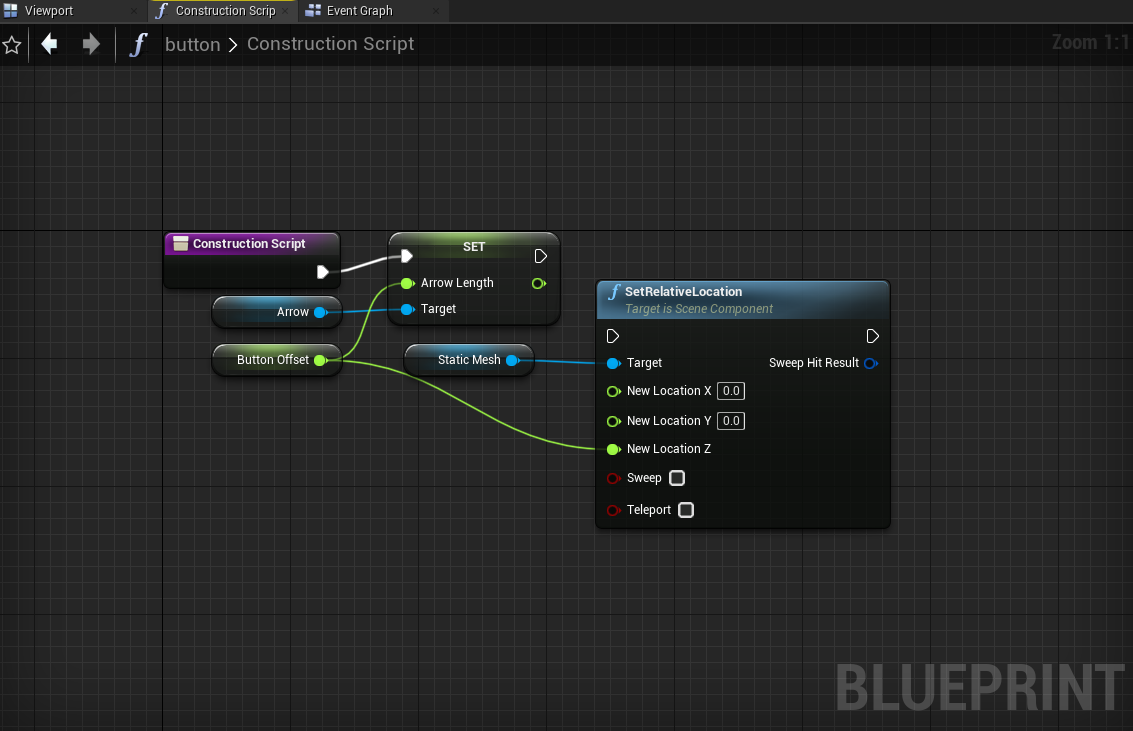
Moving onto the construction script, I dragged the arrow onto the graph. Ensure you make a Float variable and name it button offset. Connect these to a node Set Arrow Length and the Construction Script node.
Drag the static mesh onto the graph and SetRelativeLocation. Split the structure of the location pins since we'll only be using Z. Connect location Z to button offset. You can change the button offset default value to 100 to see how the cube moves. Now we need to go onto the event graph and only use the event tick.
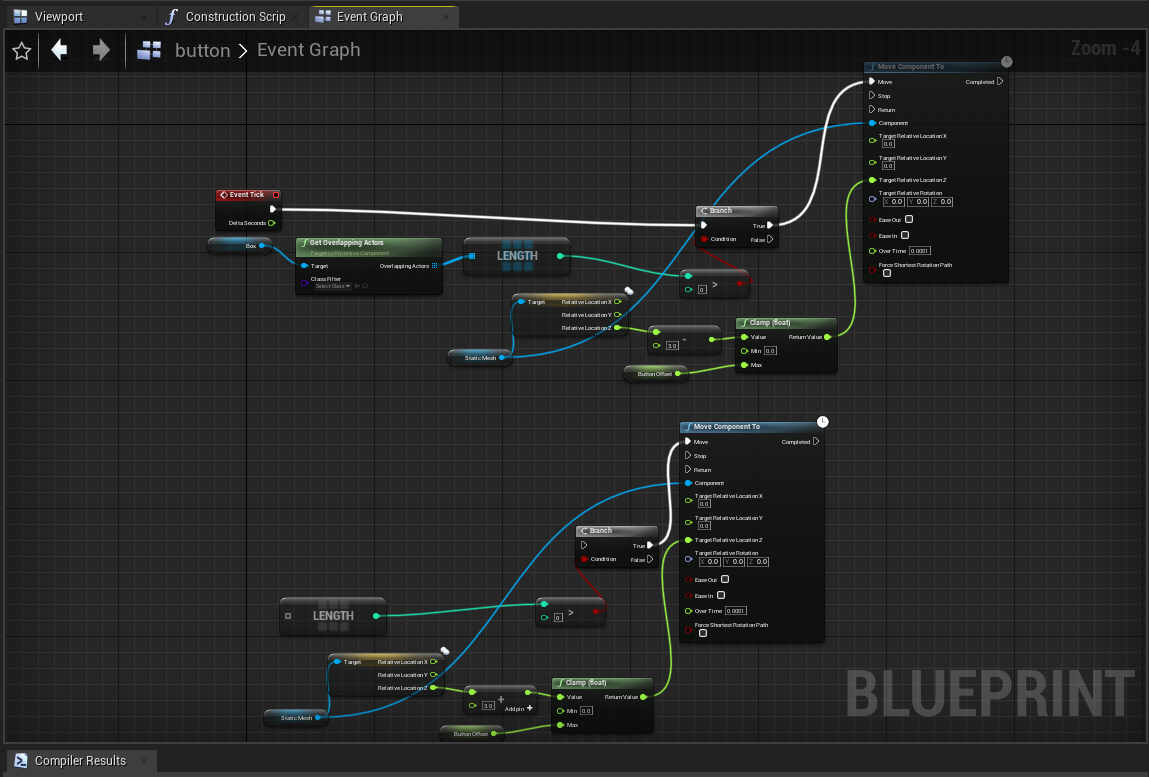
Drag the box collision component onto the graph, connecting it to a Get Overlapping Actors node. Affix overlapping actors to length, which then further connects to '>'.
Event tick now needs to be conjoined with a Branch node, as well as the greater than node. Get the static mesh; join this with a RelativeLocation node. From Location Z, connect it to a - node, and type in 3. The Button Offset should adjoin with the Clamp (float)'s max pin.
Join up the static mesh with a Move Component To node. The clamp should connect to move component to's relative location Z, and the pin 'move' should be connected to 'true' in the branch.
From LENGTH and onward, copy and paste all the nodes just underneath. The only thing we'll be changing is the subtract node for the addition node. Ensure the value is set to 3; this is the time it takes for the button to be pressed and released. 'Overtime' on the move component to node can be left at 0.0001, all these values affect the time it takes for the button to animate.
The button tutorial is now completed.
Visual Reality
Explore the map and try out the different interactions.
| Status | Prototype |
| Category | Assets |
| Author | lish123 |
| Tags | customise, First-Person, functions, interactions, Singleplayer |
More posts
- Design ElementsJan 20, 2023
- ChallengesJan 20, 2023
- Drawing on SurfacesJan 16, 2023
- Climable Interaction Part 2Jan 16, 2023
- Climbable Interaction Part 1Jan 15, 2023
- Making a Simple Menu in VRNov 01, 2022
- Making an Interactable Door in VROct 14, 2022
- Getting StartedOct 14, 2022
Leave a comment
Log in with itch.io to leave a comment.